If the season has either just started or is coming to an end, you might want to clean and renew your wooden bistro set. It is always better to be sitting on a clean chair instead of a dirty one for sure. But when you clean it, you might notice that it doesn’t look just like the way it used to. The color has faded, and there also might be some damage to it. Well after a long time researching and talking to a few experts on this topic, I’ve decided to write this article that will help you a lot.
I always tell people that they should start the renewing process by cleaning their furniture. This is the only way to see how much damage there actually is and also renewing your patio furniture before it is clean would be a total waste of time, since there can be some dirt sports that will eventually fall off, maybe even after you have already repainted the whole thing. Most of you probably are wondering why I am pointing out such an obvious thing, but trust me you’d be surprised how many people have no clue about this.
So with that being said let’s move to the process itself. It is not so hard at all, in fact, I believe that anyone of you will be able to do it after reading this article. If it helps you can even read it on your phone while you are doing it. First, you should clean your wooden furniture.
How to clean your wooden outdoor furniture?
When it comes to cleaning wood you should keep in mind that it requires a soft cleaner. Anything more aggressive might damage the paint or the furniture oil on it.
What will you need to clean your wooden furniture:
-A bucket filled with water (preferably warm)
-Soft brush
-Garden hose
-Few drops of mild soap
Step 1: Spray your furniture with a garden hose
You should first make it wet before you start scrubbing it. You have to be careful about the settings of your water hose. Set it on low and spray all the pieces all over. If you have any cushions on, make sure to take them off first. Cushions require a different cleaning method. I really wouldn’t recommend that you use a pressure washer for this step unless yours can be set on really low pressure. Also going too close with a pressure washer can damage your furniture. Keep your distance (at least 2 feet between the tip of your pressure washer and the chair)
It would be best to do this somewhere in the shades because you want your chairs, table, etc to stay wet during the process. If it dries out too quickly it will leave stains.
Step 2: Mix the soap with the warm water in the bucket
The reason that your water should be a bit warm is that warm water is so much better for cleaning than cold water. A few drops of mild soap should do the trick, but if you have any tougher spots you will have to use an all outdoor cleaner that is wood friendly. The process with any other cleaner will pretty much be the same, the only difference is that you are using the cleaner instead of just mild soap.
Step 3: Brush your furniture with water mixed with soap
Make sure not to leave a single inch out. If there are any spots you can apply a bit more pressure since you are using a soft brush. Do not use a metal or any other kind of hard brush because it will damage your wood. I have done this process many times and the thing that worked best for me was scrubbing in a circular motion.
Step 4: Rinse your wooden outdoor furniture
Take your water hose and rinse your table, chairs, etc. with it. Just like I have mentioned before, you do not want your furniture to get dry while the soap is on. So if it’s really sunny and warm outside, make sure to do this in a shady place or wait until the evening or the next morning to do this. Again you should make sure to get all the soap of.
Step 5: Allow your outdoor wooden furniture to dry off
When you have rinsed it with your water hose, you can take it out of the shades and let it dry in a sunny spot. This might take some time, depending on the weather and temperature outside. Do not worry. You can use this time to clean your outdoor cushions if you have any. If not, you can get yourself a cold drink and enjoy it.
At this point, your furniture should be dry enough to be inspected for damage. Some people don’t mind the old look on their outdoor set, but if you are not one of those people, then here is what you should look for:
-Cracks
Cracks are definitely one of the most dangerous things for wood if it is left outside. Whenever it is raining, the water will get into those cracks and the wood will start to mildew. If you find any cracks I suggest that you immediately act upon them and protect your wood from any further damage. Did you know that leaving cracks unprotected can lower the life expectancy of your wood by up to 75%? I will describe the process of how to renew your wood and protect it from this in just a minute.
-Small circle-shaped holes
If you have any small holes, usually there is a lot of them, then you may as well throw away your outdoor furniture. This is because the holes were made by parasites that eat wood and make it extremely weak. I once tried to sit on a wooden chair that had lots of small holes in it and guess what? It broke and I was on the ground in 0.4 seconds.
-Faded color
Color fading is a natural thing, but you might want to act upon it anyway since a lot of wooden products use colors that are also protectors mixed with furniture oil. This means that your furniture might not be as protected as it used to be. I would definitely run to the hardware store and get a small bucket of new paint. Just make sure that it is matching and that it is made for outdoor use.
How to renew and protect your outdoor wooden furniture:
Well if you have found any damage (cracks or faded color) on your table or chairs it is time to take action! Get a color that is matching and that is made for outdoors and let’s get to work!
What you will need:
-Color for outdoor wood
-A paintbrush
-Furniture oil (In some cases the color is already mixed with furniture oil, so you do not need to apply it)
-Sander or just some sandpaper
Step 1: Sand your wooden furniture
If you own a sander then this step will be done much quicker, but if you don’t you can try borrowing one from a friend or buy it. They got really cheap. In fact, I just bought one recently for under 20$. If none of these options suit you then you can use sandpaper but it will take you much longer.
Make sure to sand it all over, and pay the most attention to the places that are damaged the most. If you are using sandpaper and doing this step by hand, then you will have to make sure that you are using the softer kind.
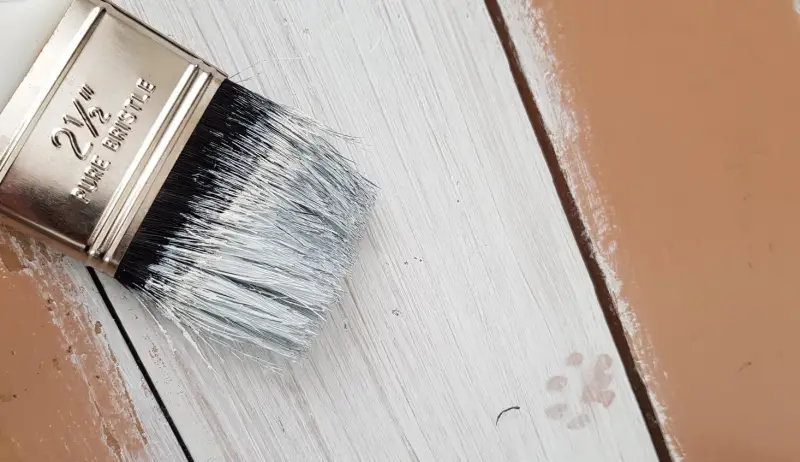
Step 2: Apply the 1st layer of paint
Open your bucket of paint and make sure to mix it first. This is important because it might be more watery on top. You can use a pencil to do this (at least I always do). Then dip your paintbrush and start painting. Make sure to get all the spots.
Step 2: Leave it to dry
I usually leave wood that has been painted to dry for at least 8 hours, but if it’s really sunny outside, then it might take less time. Just touch the fresh paint and if your fingers are clean with no paint on them that means that you are good to go.
Step 3: Apply the 2nd layer of paint
Once it is dry it would be time to apply the second layer of paint. You might notice that after the first layer the wood is still visible through a bit. You want to apply 2 layers to change that.
Step 4: Leave it to dry again
If you have been using a color that already has protective wood oil in it (check the label on the paint bucket) then you should be ready to go but if not you will have to apply a layer of wood oil for outdoors on. Don’t worry. These days, 90% of the wood colors for outdoors come with protective oil mixed in them. So make sure that your paint is made for outdoors.
Now that you are finished with cleaning and renewing your wooden outdoor furniture it is time to clean the cushions as well. If you do not have any then you can go enjoy your cleaned and renewed patio furniture.
How to clean patio furniture cushions?
First, you want to check if the covers can be taken off and washed in a washing machine. You can see if they are by checking for buttons or a zipper. If that is the fact for you, just check the label to see how to wash them and get the job done but if they are not (like in most cases) then you will have to clean them in another way.
You can clean them yourself in two ways; either with a pressure washer or by hands. If you have a pressure washer, it is always smart to keep your distance (at least 2 feet between the end of your pressure washer to the cushion that you are washing).
Cleaning your cushions with a pressure washer:
Step 1: Rinse your cushions
It is best to rinse them with just water first before applying any sort of cleaner to them. This was you will make your process much easier.
Step 2: Fill your pressure washer with the cleaner
You have to make sure that your pressure washer has a container for a cleaner. If it does not, then you will just have to get a bucket of warm water (about a gallon) and ¼ cup of dishwashing liquid.
Step 3: Clean your cushions with your pressure washer
Again make sure to keep your distance so that you do not do any damage to them. Make sure to clean them all over.
Step 3: Use your brush to fight tougher stains
If there are some stains that I got on your cushions from spilled drinks or food, then you will probably have to get a brush and rub those spots by hand. Remember to use a soft brush, because a harder one will damage your cushions.
Step 4: Rinse your cushions
You can now rinse your cushions with just water. Make sure to get all the soap and/or cleaner off of them, and just like by cleaning your wooden furniture you will have to make sure that your cushions do not get dry before this step is over.
Step 5: Remove excess water from your cushions
If your cushions are thicker you definitely want to do this to prevent mildew. Also, the time that it takes for them to get dry will be much shorter this way.
Step 6: Leave your cushions to dry
You can put them on a sunny spot to make this process faster. If you do not wait for them to get dry you will get wet when you will sit on them.
Cleaning your cushions by hand:
The process here is pretty much the same, but instead of a power washer, you will be using a water hose and a bucket of water mixed with dishwashing liquid.
Step 1: Mix 1 gallon of water with ¼ cup of dishwashing liquid
I usually use a bucket for this, since it is the best choice in my opinion. Also, make sure that you have a soft brush.
Step 2: Rinse your cushions
You can use a water hose to do this. Just make sure that it is set on spraying. Remember you are trying to clean them and not water them.
Step 3: Scrub your cushions with your brush
First, dip the brush in the dishwasher liquid mixed water and then start scrubbing. You might need to pay more attention to the stains. What always worked for me is scrubbing them in a circular motion.
Step 4: Rinse your cushions
Use your water hose to wash off all the foam that is now on your cushions. Again make sure that it is set on spraying.
Step 5: Remove excess water from them
Just like washing your cushions with a pressure washer, you will have to apply some pressure to them to get the excess water out of them. Trust me this way they will get dry much quicker and you will also prevent any kind of mildew inside.
Now you just have to let them dry off completely and then you are ready to go.
Conclusion:
Whenever you are renewing your wooden patio furniture or bistro set it is important to clean it first. This way you will be able to evaluate the total damage that it has and later know what kind of action to take. When it comes to renewing you should sand the wooden furniture first and then apply 2 layers of outdoor paint to it. Make sure that the paint you are using has protective oil in it. If it does not then you will also have to apply a layer of furniture oil to it. If you have any cushions, now would be the best time to clean them as well. You can do this by either using a pressure washer or just a water hose and a bucket of warm water mixed with ¼ cup of dishwashing detergent. When they are dry you can put them back and start enjoying your cleaned and renewed wooden patio furniture or bistro set.
If you have any thoughts on this article, please feel free to drop a comment below. Have a nice day!