DIY Seed Pods for Your Countertop Garden
A plain guide to making DIY seed pods for countertop hydroponic gardens: baskets, sponges, seeds, domes, and spacers.
You can make your own seed pods for a countertop hydroponic garden by reusing the plastic baskets, filling them with a peat, coco coir, or rockwool plug that fits, sowing one or two seeds in the hole, and covering the pod with a dome until the seedling pushes it off. Empty holes get a spacer so light stays out of the water. The advice below works in any countertop hydroponic garden, not just the brand you may have seen on a box.
What a seed pod actually is
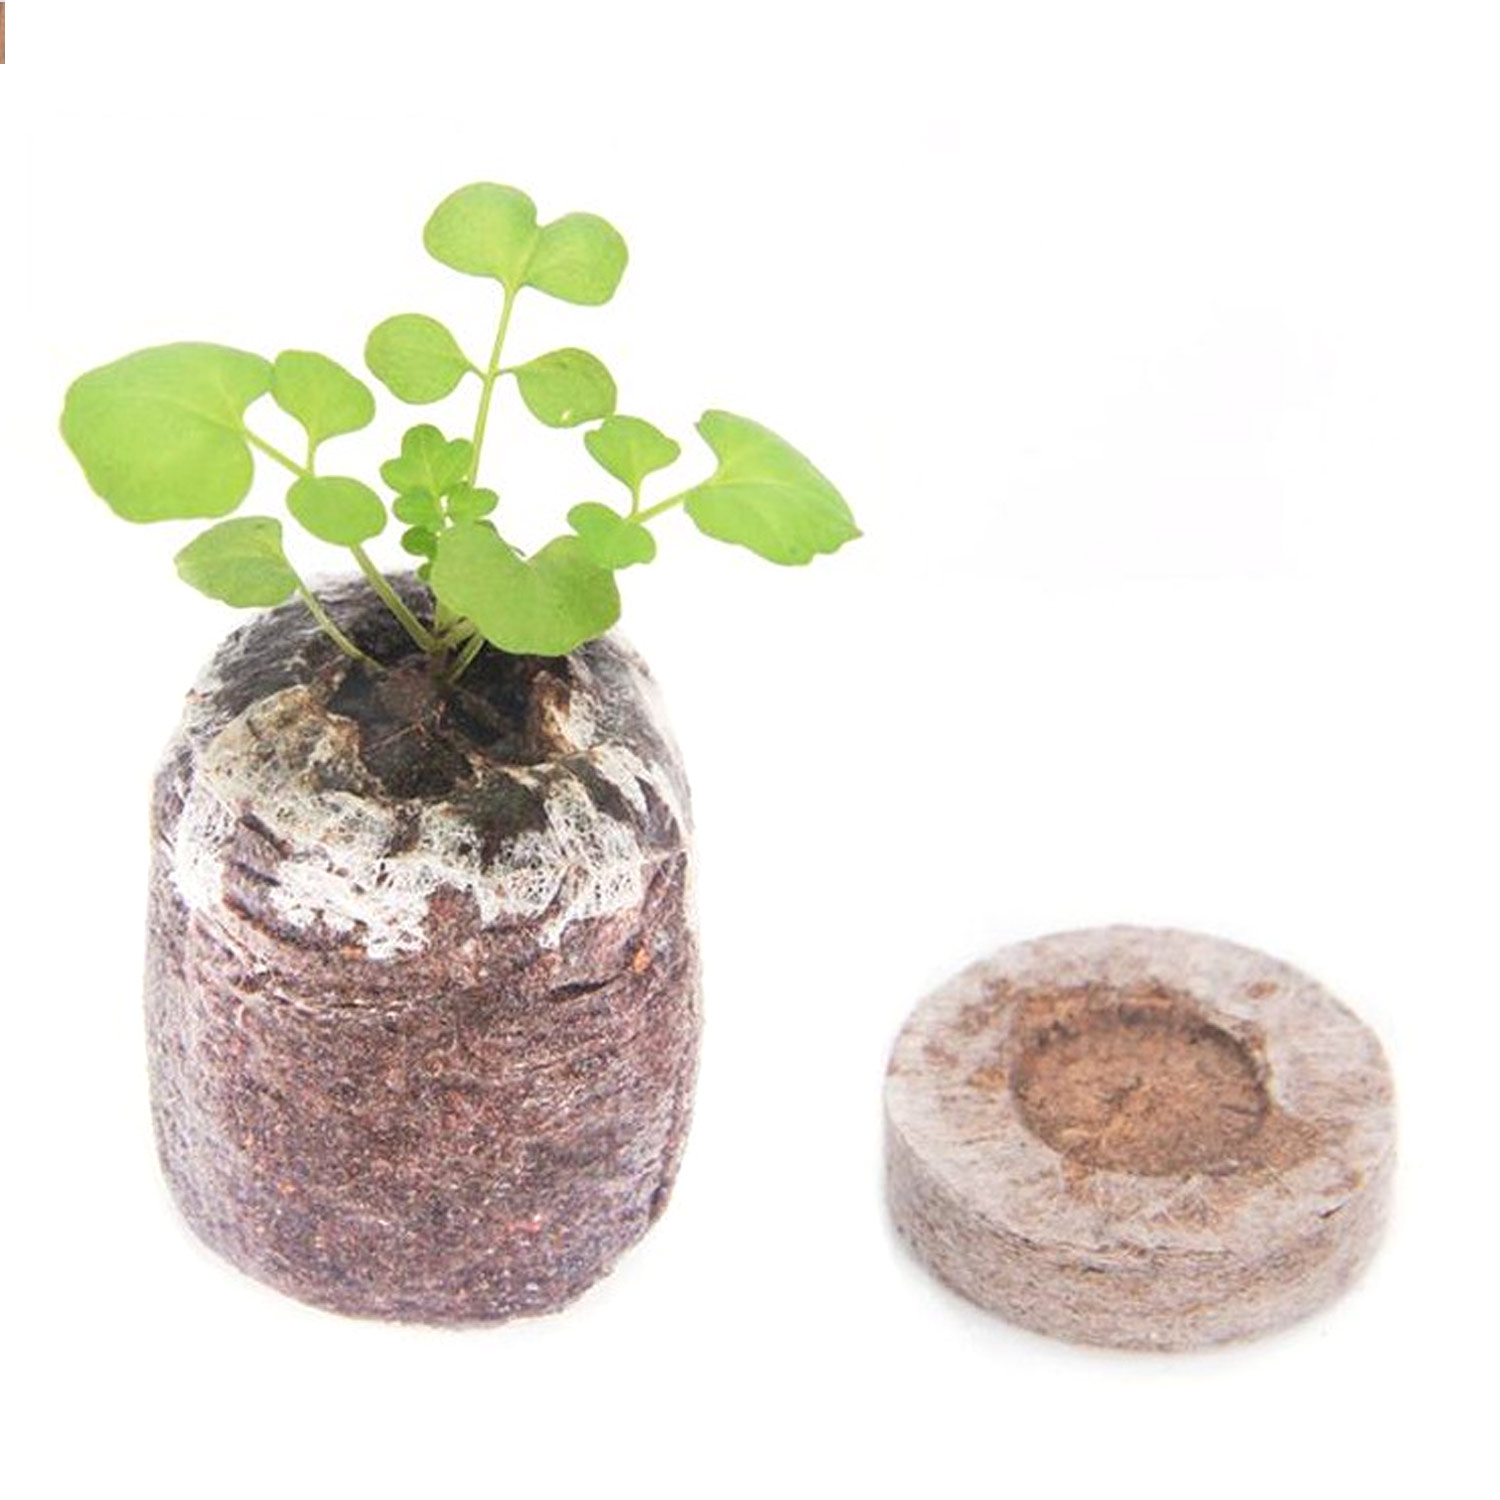
A seed pod is three simple parts: a grow sponge, a plastic basket that holds it, and a label or dome on top. The sponge is usually peat-based, though coco coir and rockwool are common too. It holds moisture, gives roots something to grip, and keeps the seed at the right depth. The basket keeps the sponge from falling into the reservoir. The label or dome keeps the sponge from drying out before the seed sprouts.
Once you see it that way, making your own is mostly a matter of matching sizes and keeping things clean.
Reusing baskets and labels
The plastic baskets and the little domes last a long time. After a crop finishes, pull the old sponge and roots out of the basket, rinse it under warm water, and scrub away any root bits or slime with a soft brush. A soak in a mild bleach solution followed by a good rinse works if the basket held a sick plant. Let everything air dry before you use it again.
Labels can be reused too. Peel the old one off, write the new seed name on a fresh piece of tape, or just keep a paper list next to the garden. If the label is a dome, keep it for germination and take it off once the seedling touches it.
If you would rather start fresh, our seed starting supplies include baskets, domes, and plugs that fit most countertop gardens.
Choosing a sponge material
Peat plugs are the closest match to what most gardens ship with. They hold water well, are easy to poke a hole in, and break down slowly. Coco coir plugs behave much the same and are a good choice if you want a renewable material. Rockwool plugs hold more air and drain faster, which suits herbs that dislike wet roots, but they can shed fibers, so handle them gently.
What matters more than the material is the fit. The plug should fill the basket without squeezing through the bottom, and it should sit so the top is level with or just below the rim. If a plug is too tall, trim it with scissors. If it is too short, add a small piece underneath.
Sowing seeds in your own pods
Drop one or two seeds into the hole in the plug. Two seeds give you a backup if one fails; if both sprout, snip the weaker one at the base with small scissors so the stronger plant has room. Cover the hole lightly with a pinch of loose plug material or a few grains of vermiculite.
Set the pod in an empty hole in the garden and let the garden's watering cycle do the rest. Keep the dome on until the seedling lifts it. At that point, remove the dome so the leaves get light and air. Follow the nutrient schedule in your garden's manual, and top up the water when the level drops.
If you are deciding what to plant, our guide to the best herbs for a countertop garden covers which herbs stay compact and which ones outgrow the space.
Making spacers for empty holes
An empty hole lets light into the reservoir, and light plus nutrients equals algae. A spacer is any opaque cover that sits in the hole and blocks light. You can buy them, but you can also cut them from a plastic lid, a yogurt cup, or a piece of foam board. Cut a circle slightly wider than the hole so it rests on the rim, and press it in place.
A spacer does not need to be pretty. It needs to stay put, block light, and not fall into the water. Check it when you refill the garden.
Common problems and what causes them
| Problem | Likely cause | Fix |
|---|---|---|
| Seed never sprouts | Plug too wet, too dry, or seed planted too deep | Wring excess water from the plug, sow shallow, keep the dome on |
| Seedling falls over | Stem stretched toward a distant light | Lower the light or raise the pod so leaves sit close to it |
| Sponge turns green | Light reaching the wet sponge | Add a spacer to empty holes, cover exposed sponge with a collar |
| Roots push the pod up | Basket too small for the plant | Move the plant to a larger basket or a pot with drainage |
| Water smells sour | Old roots and sponge left in the reservoir | Remove spent pods, rinse the reservoir, change the water |
| Mold on the sponge surface | Poor airflow and a soaked plug | Take the dome off after sprouting, keep the plug damp not dripping |
Most of these come down to light, water, and air. Fix the one that is out of balance and the plant usually recovers.
When to move a plant out of the pod
A pod is a nursery, not a permanent home. When roots fill the basket and start trailing into the water, the plant is ready for a bigger space. Herbs like basil and mint grow fast and will crowd a countertop garden within a few weeks. Moving them to a planter or pot with drainage gives the roots room and keeps the garden from turning into a tangle.
If you want to keep the plant in the garden, trim the roots and the top growth at the same time. Cutting the top without cutting the roots leaves the plant top-heavy and thirsty.
Storing pods you are not using yet
Made more pods than you need? Let them dry slightly, then store them in a paper bag or a breathable container in a cool, dark place. Do not seal wet plugs in plastic; they will mold. Label the bag with the seed name and the date so you know what you have.
For a deeper look at planting, storing, and reusing pods, see our guide to seed pods for countertop gardens.
A simple routine that works
Make a batch of pods when you have a free half hour. Reuse the baskets you have, cut plugs to fit, sow one or two seeds each, and set them in the garden with domes on. Fill every empty hole with a spacer. Check the water level and the light height every few days. When the seedlings touch the domes, take the domes off. When the roots fill the baskets, either trim them or move the plant to a pot. That routine keeps a countertop garden producing without a trip to the store for pods.
Common questions
- What are seed sponges made of?
- Most are made of peat, coco coir, or rockwool. Peat and coco coir hold water well and are easy to poke a hole in. Rockwool holds more air and drains faster. Any of them work if the plug fits the basket snugly.
- Can I reuse the plastic baskets and domes?
- Yes. Rinse them, scrub away root bits and slime, and let them dry. A mild bleach soak followed by a thorough rinse is fine if the previous plant was sick. The plastic lasts through many crops.
- What can I use as a spacer for empty holes?
- Any opaque cover that blocks light and rests on the rim. A circle cut from a plastic lid, a foam board, or a sturdy cup works. It does not need to be a specific product, just something that stays put and keeps light out of the water.
- How do I know when to take the dome off?
- Take it off when the seedling lifts the dome or touches it. At that point the plant needs light and air. Leaving the dome on longer keeps the sponge too wet and can encourage mold.
- Why did my homemade pod grow algae?
- Light reached the wet sponge or the reservoir. Cover exposed sponge, put spacers in empty holes, and make sure the garden's lid sits flat. Algae is a light problem, not a seed problem.
AeroGarden is a trademark of its owner. My Garden and Lawn is not affiliated with it and does not sell AeroGarden units; the advice here applies to any countertop hydroponic garden.